0

0

PREV
NEXT

ABOUT US

WHO ARE WE

Changsha Xingfeng Transmission Machinery Co., Ltd. was established in 2008 and won the honorary title of "National High-tech Enterprise" in Hunan Province in 2020. Since its establishment more than ten years ago, the company has been focusing on the promotion of high-quality industrial transmission belts and conveyor belt products to various industries, helping companies solve technical problems related to transmission and conveying, saving energy consumption, and improving production efficiency.

Business advantage

Decades of rich experience and driving ability in entrepreneurship and continuous operation have established a stable, efficient and standardized management system.

Product advantages

Regard quality as the life of the company, pay close attention to product quality, and do the best for customers with the greatest possible possibility! The company independently produces, processes, and sells various products to meet customer demand and various requirements for products.

企业介绍

1000

1000 professional and technical personnel

20

The company has been established for 20 years

80

80 branches nationwide

120000

120,000 customers have been served

OUR ADVANTAGE

01

Imported equipment
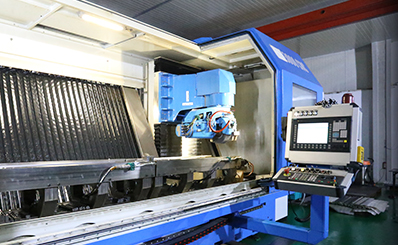
Imported equipment

Equipment is the key to quality, and the company has introduced a large number of imported equipment. The precision of the grinding rack can reach level 5 of German DIN3962 standard, the modulus is m0.5-m22, and the length can reach 2.5 m.

02

Constant temperature processing
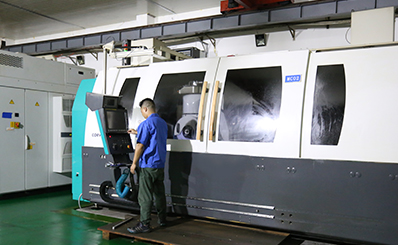
Constant temperature processing

In order to ensure that the accuracy of the workpiece is affected by temperature and humidity, the company's heat treatment technology is mature, and it is processed at a constant temperature throughout the year. With many years of rich experience and professional technology, under strict quality control, we can complete high-level products.

03

Craftsmanship
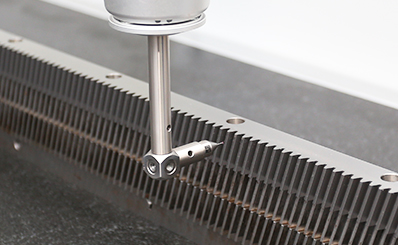
Craftsmanship

Use three-coordinate measuring instrument, projector, large-scale granite testing platform, hardness tester, coating thickness gauge and other testing equipment. The rack has straight teeth and helical teeth, which can be quenched on the tooth surface or carburized and quenched as a whole.

RECOMMENDED

 MSTMQ直齿精铣齿条
MSTMQ直齿精铣齿条
 MSTRH直齿磨削齿条
MSTRH直齿磨削齿条
 MHTZH斜齿磨削齿条
MHTZH斜齿磨削齿条
 MHTGH斜齿磨削齿条
MHTGH斜齿磨削齿条
 MHTMH斜齿精铣齿条
MHTMH斜齿精铣齿条
 MHTMQ斜齿精铣齿条
MHTMQ斜齿精铣齿条
 MSTGH直齿磨削齿条
MSTGH直齿磨削齿条
 MSTMH直齿精铣齿条
MSTMH直齿精铣齿条
 MSTMQ直齿精铣齿条
MSTMQ直齿精铣齿条

HISTORY

  • 2016

    2016

    Data collation

  • 2015

    2015

    Data collation

  • 2014

    2014

    Data collation

  • 2013

    2013

    Data collation

  • 2012

    2012

    Data collation

  • 2010

    2010

    Data collation

  • 2008

    2008

    Data collation

  • 2007

    2007

    Data collation

NEWS CENTER

2019

07 12

A valuable industry research report can complete the industry system and complete research and analysis work, so that decision makers...

2019

11 02

The methods and techniques for adjusting the clearance of rack and pinion installation, the detection standards of straightness and parallelism of rack and pinion assembly, and related precautions are described below for reference. 1. Tips for adjusting the gap between rack and pinion installation: Method 1. As shown in Figure 1, when the gear and rack are engaged, insert a copper foil with the required gap thickness, such as a copper foil with a thickness of 0.02mm, and apply a certain pre-pressure to the gear to make the gear and the rack compact , And then push the gear to turn the copper foil, the final gap we get is about 0.02mm. Method 2. As shown in Figure 2, the gear and rack are meshed as shown in the figure above. After the gear is pre-tightened, the gear swings back and forth slightly, and the gap is seen on the swing table. Adjust the gear up and down to adjust the gap. Note: When assembling gears and racks, ensure that they are parallel and perpendicular, and the concentricity should also be within the standard range, otherwise it will affect the assembly and use. It is better to have several strip-shaped (5-20mm) holes in the screw holes of the reducer to adjust the gap between the gear and the rack. 2. Instructions for straightness and parallelism testing of rack assembly: 1. After assembling the teeth, perform marking inspection on the back and mounting surface of the rack. When marking the table, the straightness and parallelism of the high-precision rack should be less than 0.02mm, and the medium precision should be less than or equal to 0.03mm. 2. The straightness and parallelism between the guide rail and the rack on the mechanism are less than 0.02mm for high precision, and less than 0.03mm for precision. 3. When assembling high-precision gears and racks, the backlash is less than 0.02mm, the backlash of conventional precision is less than 0.06mm, the concentricity is less than 0.02mm, and the general precision is less than 0.03mm. 4. Working environment In a good lubrication environment, if the assembly does not meet the above standard requirements, the following consequences will be caused: 1. The accuracy is not up to; 2. Loud noise; 3. It is easy to cause the wear of the gear rack and reduce the service life. Therefore, everyone must strictly install and operate on the gap adjustment of the rack and pinion installation. If you are unclear, you can ask the technician for help.

2019

07 12

A valuable industry research report can complete the industry system and complete research and analysis work, so that decision makers...

1999

08 11

The racks are also divided into spur racks and helical racks, which are paired with spur gears and helical gears respectively; the tooth profile of the rack is straight instead of involute (for the tooth surface, it is flat) , It is equivalent to an infinite cylindrical gear with the index circle radius. Main features of rack (1) Since the rack tooth profile is a straight line, each point on the tooth profile has the same pressure angle and is equal to the inclination angle of the tooth profile. This angle is called the tooth profile angle, and the standard value is 20°. To (2) Any straight line parallel to the addendum line has the same pitch and modulus. To (3) The straight line that is parallel to the tooth top line and whose tooth thickness is equal to the width of the tooth slot is called the index line (midline), which is the reference line for calculating the rack size. To    The main parameters of the rack Tooth width, tooth tip height, tooth root height, tooth height, tooth thickness, tooth root radius, etc.  

Changsha Xingfeng Transmission Machinery Co., Ltd. is headquartered in the Zhigu Industrial Park in the middle of Changsha Economic and Technological Development Zone, Changsha, China (Hunan) Free Trade Zone. The company has internationally advanced flat belt and conveyor belt production and processing equipment; polyurethane timing belt processing equipment; high-speed, high-precision timing pulley and gear production equipment and professional product testing equipment, and a professional sales team and technical team provide special services , To ensure that the quality of products and technical services can satisfy customers.

No. 503, Building 5, Zhigu Industrial Park, Central Huangxing Avenue, Changsha Economic and Technological Development Zone, Changsha Area, China (Hunan) Free Trade Zone

©2008-2021 Changsha Xingfeng Transmission Machinery Co., Ltd. All Rights Reserved.    备案号:湘ICP备2021019838号-1   Website building:xinnet